Gamification Features
LearningCart includes several Gamification related features including the option to assign points to activities such as logging in, completion of courses and quizzes. It also includes a Leaderboard display for users.
To access these features, Gamification must be enabled. Update the Gamification field to Yes in Site Settings.
Badges
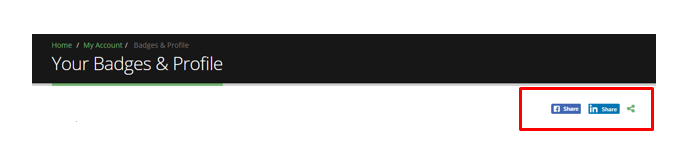
LearningCart allows you to create custom Badges that are assigned to Courses. Users can then earn badges as they complete training. These badges are shown on their profile page and can be shared on social media such as Facebook or LinkedIn.
To add or edit a Badge, go to Training > Content & Settings > Manage Badges. For each badge you can specify the following:
- Badge Name: Enter the name of the badge. This will display on the User's profile page.
- Active: If checked, the badge will be active and available for use.
- Expiration: Select the type of Expiration for this Badge - a number of Months, or a specific date.
- Badge Image: Select the image you have created for the Badge using the Browse link.
- Badge Description: Enter the Badge description.
Once you had added a badge, you can associate it by navigating to a Course and then expanding the Course Settings section and selecting your desired badges under the Badges section.
Points
Points Messages
Points Messages are shown to users when they login to the ‘My Account’ area. This feature is frequently used to encourage users as they progress or to offer incentives such as a discount code that is automatically shown once a user achieves a certain number of points. Gamification must be enabled to use this feature. Points can be earned by logging in each day and completing training modules or quizzes.
Points Messages can be managed by navigation to Training > Content & Settings and then clicking Manage Points Messages. For each message you create, you can specify the following information.
- Low Point Threshold: Customers will see this message only if they have above this number of points.
- High Point Threshold: Customers will see this message only if they have below this number of points.
- Groups: When groups are specified, this message will only be available to customers in the specified groups.
- Message Begin Date: The date when this message will begin to show.
- Message End Date: The date when this message will stop showing.
- Message: Add your custom message. Insert [CustomerPoints] to display the current customer's total points. Insert [LowThreshold] to display the message's Low Threshold points, [HighThreshold] to display the message's High Threshold points.
Assigning Points
As you add content to the system you can specify the number of points a user achieves upon completing/passing that content. A Points field is available on Quizes, Forms, and Training Content.
You can also assign how many points a user earns every day that they login to the site. This number can be specified under Website > General Settings after expanding the Site Settings section.
Leaderboard
On the My Account page, Customers can click the Leaderboard icon to view where they stand in comparison to other registered users for total number of points achieved. This can be used to (for example) – drive users to purchase and complete specific courses and potentially win awards/discounts etc.

To implement a Leaderboard display and custom points messages, Gamification must be enabled. You must also check the "Group" high score board for the groups that will view a Leaderboard (including the default group).
FAQs
How can my users add training completed in other systems to their profile?
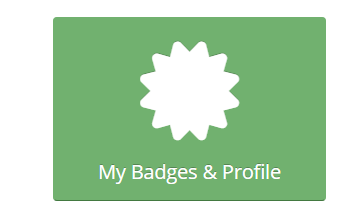
LearningCart can be configured so that your users can add training completed in other systems to their User Profile and share that information on social networks. The External Training Records Enabled option in Site Content/Site Settings must be set to 'Yes' to configure this option. For help on setting this option, see Site Settings. Once that option is set, users will have an additional My Badges & Profile icon on their My Account page.
The user can click 'Add Record' and add details of training previously completed.

Once the items are added, the User can share their profile with others via LinkedIn, Facebook or a direct URL.